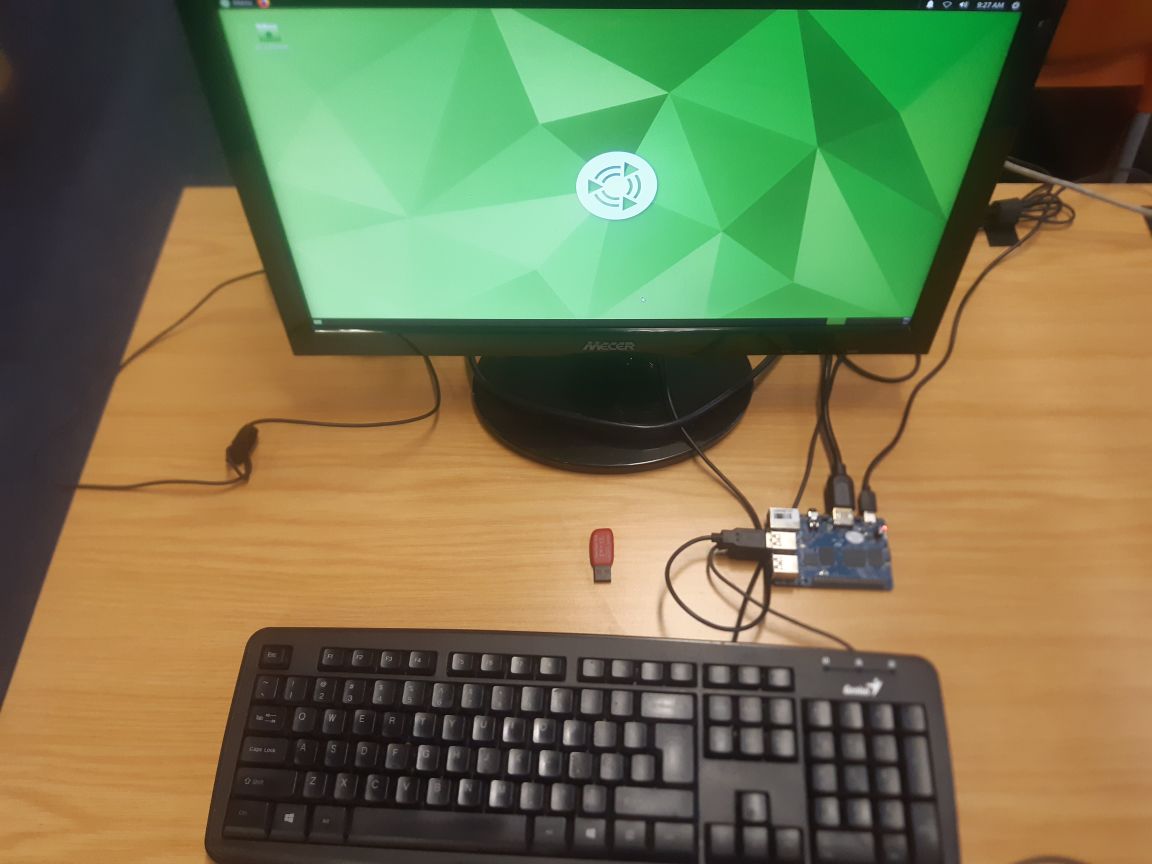
The Banana Pi M5 (BPI M5) is a powerful small board computer, great for home projects and just use as a Desktop. This little board boasts features a Rockchip RK3568 Quad-Core Cortex-A55 processor running at 1.5GHz with Mali-G52 GPU, coupled with 4GB LPDDR4 RAM. It offers storage options via a microSD card slot supporting up to 256GB and an optional eMMC module. Connectivity includes 802.11 b/g/n/ac Wi-Fi, Bluetooth 5.0, and Gigabit Ethernet, while ports comprise 1x USB 3.0, 2x USB 2.0, HDMI 2.0 supporting 4K@60Hz, and a 3.5mm audio jack. The board also features a 40-pin GPIO header compatible with Raspberry Pi, MIPI CSI for cameras, and supports Android 11, Ubuntu, Debian, and other Linux distributions. It can be powered via USB-C or a 4.0mm DC jack with a 5V/3A input and has a built-in Li-Po battery interface. The compact 85mm x 56mm form factor includes an IR receiver, RTC battery header, and onboard speaker header.
The Banana Pi M5 provides excellent value with regularly updated firmware readily accessible. However, their documentation can be a bit tricky for newcomers to IoT devices and Linux. In this guide, we'll walk you through the process of flashing the firmware onto a micro SD card.
Banana Pi M5 Image Selection
When choosing an image for your Banana Pi M5, it's essential to pick one compatible with the board's hardware and suitable for your project. You can opt for Banana Pi's official images like Android, Ubuntu, or Debian, which are well-optimized and regularly updated by SinoVoip. Another reliable choice is Armbian, offering Debian or Ubuntu-based images specifically tailored for ARM devices, including the Banana Pi M5, with regular updates and a user-friendly experience.
Canonical's official Ubuntu ARM images are also available to provide extensive software support and a familiar desktop environment. If you're planning a media center project.
In addition, although links to the images can be found on the Banana Pi Wiki they may link to older images. There have been cases in the past where images are broken too, so if you don't succeed in flashing a particular image try another. By the time you read this, the images would have been updated but the official place for image links is the Banana Pi M5 wiki.
The images we commonly use are:
- Linux - Ubuntu - Boots to GUI
- Android - Android 9 Boots to GUI
- Ubuntu - ubuntu-20.04-mate-desktop Boots to GUI
Flashing the Image to the Banana Pi M5/M2 Pro with Linux on the eMMC
There are two ways to flash the image according to the Banana Pi wiki.
- Via USB Download
- Via SD card installation
Steps to flash eMMC Module on Banana Pi M5/M2 Pro
- Preparing the M5/M2Pro for installation
- Download an image to deploy
- Put R2 Pro into maskrom mode
- Start the image deploy application
- Reboot R2 Pro
- Enjoy
1 Preparing the M5/M2 Pro for installation
We'll be utilizing the MaskROM mode method to deploy to the eMMC module. Therefore, we need to:
- Get a Type-C cable ready as it is used for downloading the Android image and ADB debugging. The M2 pro utilizes a micro-USB port for Android and or Linux image download and ADB debugging.
- Plug in a HDMI monitor
- Make sure the power is connected via a 5V/3A Type-C port on the Banana Pi M5/M2 Pro and connect the other side of the USB to your computer.
2 Prepare Sofware for Burning image
- Download and install the AML USB Burning Tool for Android image download via USB type-c on M5 and Micro-USB on M2pro, only support Windows.
- Download the latest Android or Linux image, and confirm that the md5 checksum is correct.
Note: The Banana Pi M5 and M2pro are compatible with the same Android image.
Install Image with USB Burning Tool
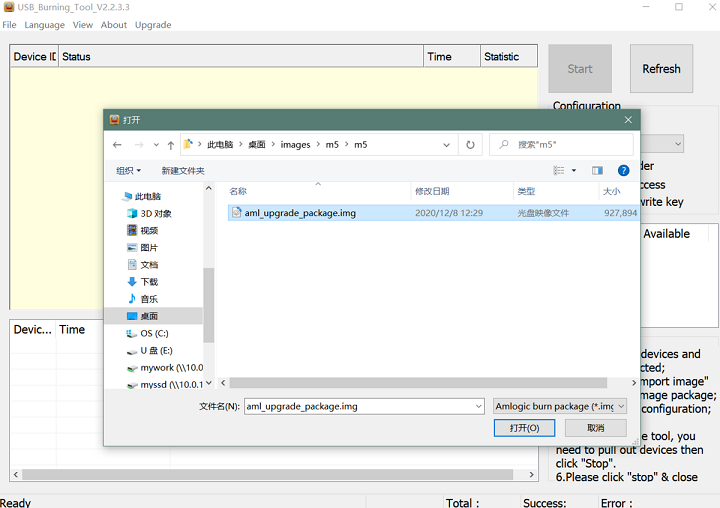
- Open USB_Burning_Tool.exe, select menu File->Import image, and choose the android image file aml_upgrade_package.img.
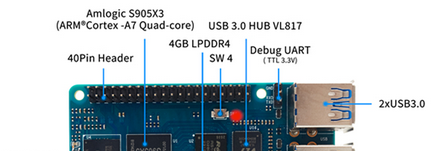
- M5/M2pro board disconnect power, press and hold SW4 button beside 40pin header, plugin type-c usb cable(microUSB on m2pro) to PC
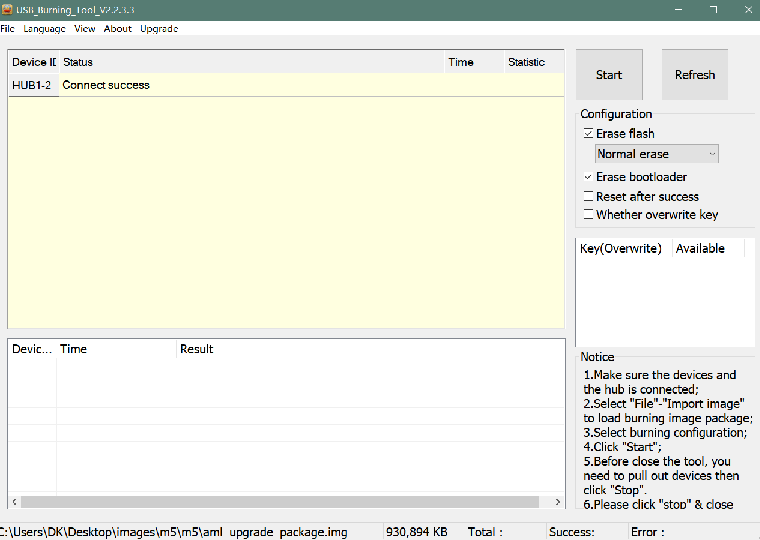
- Click the Start button and wait for the upgrade to complete.
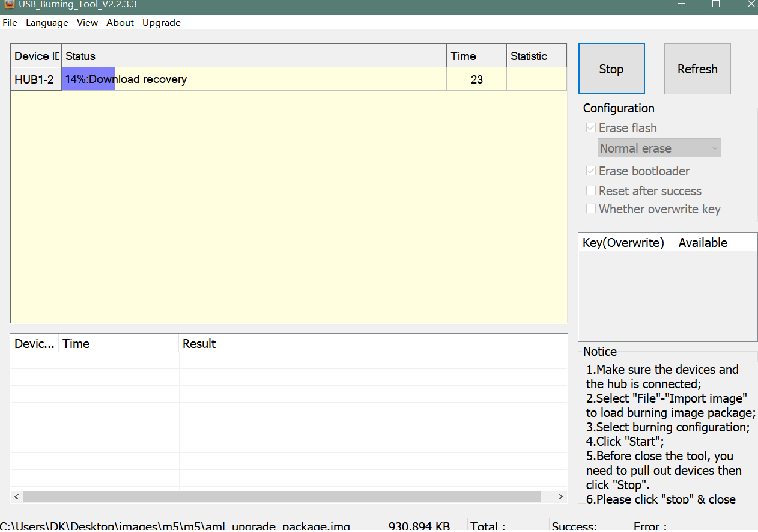
- After Burning successfully finishes, Unplug the USB and connect it to the power supply adaptor to start the operating system on the eMMC module.
Flashing the Banana Pi M5 - MicroSD Card Installation
Flashing a micro SD card for the Banana Pi M5 involves a few steps. Below is a step-by-step guide to help you flash an image onto a micro SD card:
- Micro SD card (8GB or larger recommended)
- Computer with an SD card reader
- Image file for Banana Pi M5 (e.g., official Banana Pi image, Armbian, Ubuntu, etc.)
- SD card formatting tool (Standard formatting)
- SD card flashing tool (e.g., Etcher, BalenaEtcher.
Steps:
- Download the Image: Obtain the desired image file for Banana Pi M5 from the official website or repository. Ensure that the image is compatible with Banana Pi M5.
- Format the SD Card:
- Insert the micro SD card into your computer's SD card reader.
- Use an SD card formatting tool to format the micro SD card to FAT32 or exFAT.
- Download and Install SD Card Flashing Tool: BalenaEtcher.
Flash the Image:
- Open the SD card flashing tool. (BalenaEtcher)
- Select the downloaded image file. (Flash from file)
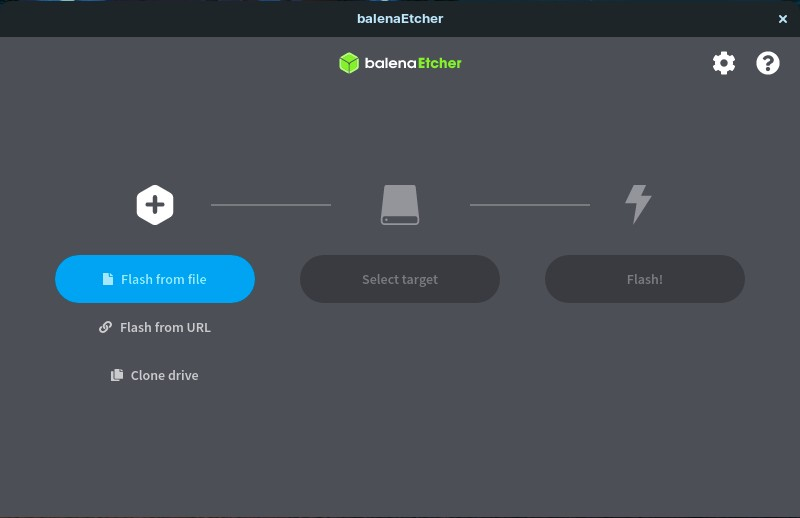
- Choose the micro SD card as the target drive. Ensure you select the correct drive to avoid data loss on other drives.
- Start the flashing process. This may take several minutes depending on the image size and SD card speed.
- Once the flashing is complete, you'll receive a notification or progress bar indicating success.
- Eject the SD Card:
- Safely eject the micro SD card from your computer.
Insert the Micro SD Card into Banana Pi M5:
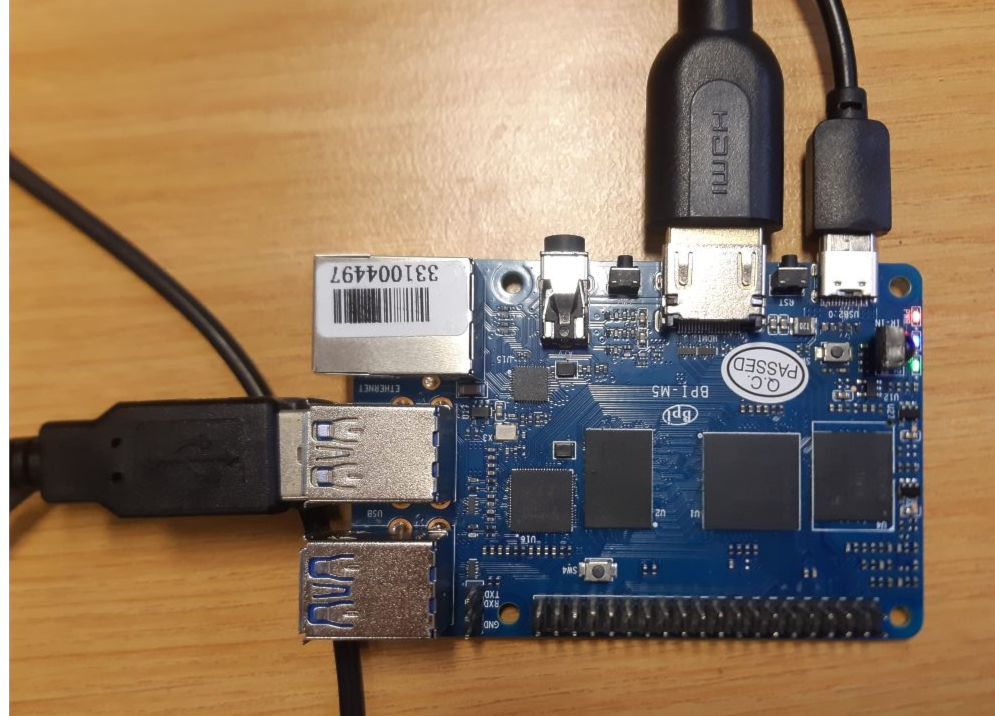
- Insert the flashed micro SD card into the micro SD card slot on the Banana Pi M5.
Power Up and Setup:
- Connect the necessary peripherals (keyboard, mouse, display, etc.) to the Banana Pi M5.
Power up the Banana Pi M5.
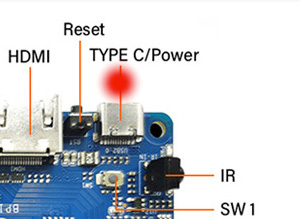
- The board should boot from the micro SD card and start the initial setup or display the OS interface, depending on the installation image you choose.
Your desktop environment should be up and running
